
Correctly placed plants guide sight lines, define zones, and either open or constrict circulation depending on scale and spacing. That single principle drives every placement decision worth making in a commercial office. Get it right, and your greenery becomes architecture. Get it wrong, and even beautiful plants make a space feel smaller and harder to move through.
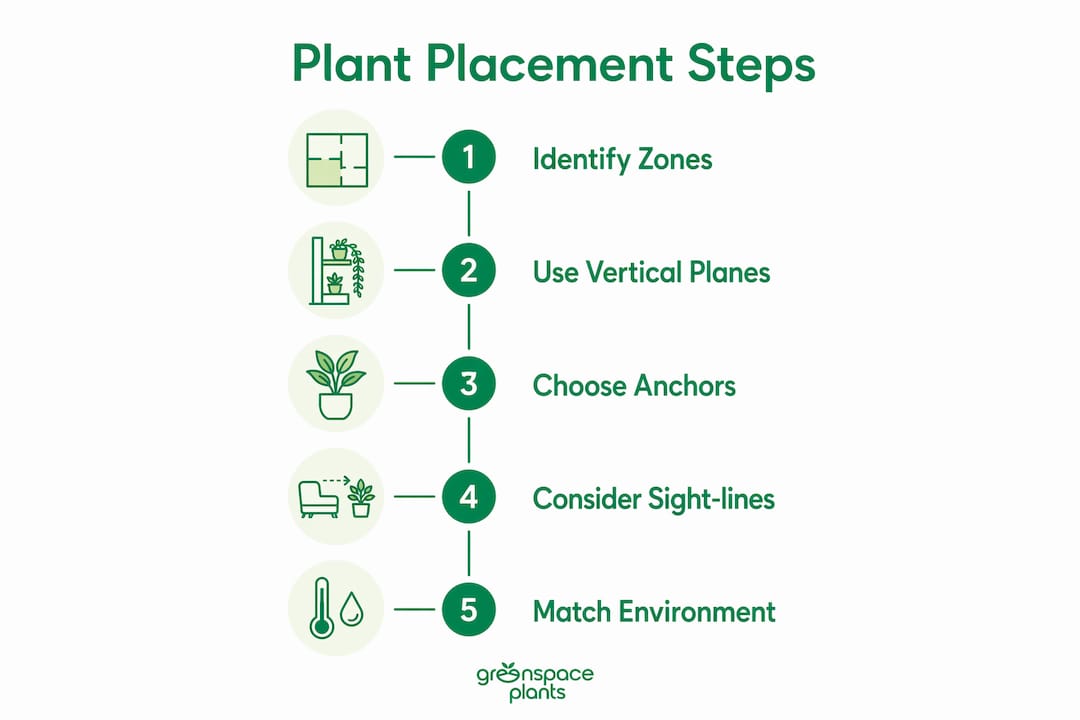
Three levers determine the outcome. First, vertical planes: distributing plants across floor, surface, and hanging levels creates architectural flow and draws the eye upward, making ceilings feel higher and rooms feel more open. Second, anchors: one large floor specimen per 150–200 square feet defines a zone without overcrowding it. Third, breathing room: reserve a significant portion of every horizontal surface as empty space so each plant reads as intentional rather than part of visual noise.
Greenspace Plants applies all three levers across commercial installations, pairing design expertise with ongoing maintenance so the arrangement stays intentional long after install day.
Table of Contents
- 7 Quick Placement Rules You Can Apply Today
- Core Design Principles That Determine How Placement Changes Flow
- Zone-by-Zone Placement Guidance for Every Office Area
- How to Group Plants and Set Spacing So Flow Improves
- Match Plants to Light, Airflow, and Human Use
- How Maintenance Needs Should Drive Placement Decisions
- What Does a Commercial Plant Installation Actually Cost?
- How to Hire a Plant Design Provider: One-Page Spec and Eight Questions
- How Do You Know If Placement Actually Improved Space Flow?
- Key Takeaways
- What Most Offices Get Wrong About Plant Placement
7 Quick Placement Rules You Can Apply Today
Before diving into the mechanics, here is a prioritized checklist you can hand to your facilities team this week.
- Place anchors in corners first. Corners are dead zones that need height and visual purpose. A large floor plant there anchors the room without blocking any path.
- Never block a primary sight line. Plants should sit beside the view, not in it. A plant directly in a major sightline shortens perceived depth.
- Group by care needs, not just looks. Plants with similar watering and light schedules clustered together simplify maintenance and create local humidity that benefits the whole group.
- Use odd-numbered clusters. Groups of three or five feel more natural than pairs or even-numbered arrangements.
- Reserve 20–30% breathing room on every shelf and surface. Negative space is what makes each plant legible.
- Prioritize light and HVAC access over visual perfection. A plant near a vent or in deep shadow will decline, and a declining plant looks accidental, not designed.
- One large anchor per 150–200 square feet. More than that and the space starts to feel crowded rather than curated.
Pro Tip: If your current collection feels cluttered, remove roughly one-third of the pots before rearranging. Designers consistently find that reducing plant count by about 33% creates clearer, more intentional compositions than adding or repositioning alone.
Quick audit (5 minutes): Walk the space and note every HVAC vent, window, and primary sight line. Mark where foot traffic naturally flows. Those observations should drive every placement decision that follows.
Core Design Principles That Determine How Placement Changes Flow
Understanding why the checklist works helps you brief a vendor, adapt to unusual layouts, and make confident judgment calls on the fly.
Vertical planes create architectural movement
Floor, surface, and hanging plants each occupy a distinct visual layer. When all three layers are present, the eye travels upward and the room feels taller. When every plant sits at desk height, the space feels flat. Think of it the way a set designer thinks about a stage: foreground, midground, and background each need a presence.

Anchors reduce visual noise
One well-chosen large specimen does more for zone definition than six scattered small pots. It gives the eye a place to land, which paradoxically makes the surrounding space feel more open.
The Sight-Line Method
Plants placed beside sight lines help the eye travel deeper into a space. Plants placed directly in major views shorten perceived depth. The practical rule: frame the view, never fill it.
Environmental conditions come first
A plant in a visually perfect but unsuitable location will decline quickly. Plants near HVAC vents or in low light without compensation suffer fast, and a struggling plant undermines the entire design.
| Design Principle | What It Does | Common Mistake |
|---|---|---|
| Vertical planes (floor/surface/hanging) | Draws eye upward, adds depth | All plants at one height |
| Anchor specimens | Defines zones, reduces clutter | Many small pots scattered |
| Sight-line framing | Extends perceived depth | Large plant blocking main view |
| Environmental-first placement | Keeps plants healthy and intentional | Prioritizing aesthetics over light/airflow |
Zone-by-Zone Placement Guidance for Every Office Area
Each office zone has a different traffic pattern, light profile, and social function. Placement that works in reception will fail at a workstation.
Entrance and reception
Place one large anchor to frame the entry sight line and create a destination. Add one or two supporting surface plants at mid-height. Keep the path to the reception desk completely clear. The goal is welcome, not obstacle course.
Circulation paths
- Keep main walkways unobstructed. Plants belong beside paths, not in them.
- Use floor anchors at path junctions to subtly nudge movement direction.
- Avoid trailing plants at shoulder height near high-traffic corridors.
Workstations and desks
Mid-height and surface plants work best here. Low, dense groupings block sight lines between colleagues and make the floor plan feel fragmented. Prioritize easy maintenance access: pots that require moving a monitor or keyboard to water will be neglected.
Meeting rooms
Soften hard furniture edges with plants at room corners and along walls. Avoid large floor plants in primary sight lines from the main seating position. A columnar form in a corner adds height without competing with the presentation wall.
Break areas and kitchens
Hanging or surface plants near windows thrive here. Cluster by care needs and keep plants away from food prep surfaces. Humidity-tolerant species do well near sinks. Avoid pots on high shelves above food areas.
Sample layout for a 400 sq ft open zone:
- One large floor anchor (6–7 ft) in the far corner.
- Two mid-level plants (3–4 ft) flanking the primary sight line, not blocking it.
- One hanging or shelf element near the window to complete the vertical plane.
How to Group Plants and Set Spacing So Flow Improves
Grouping is where most office plant arrangements go wrong. The instinct is to cluster everything together for visual impact. The result is usually a maintenance headache and a clutter problem.
Group by care needs first:
- Match watering frequency and light requirements within each cluster.
- This creates local humidity pockets that benefit plant health and cuts maintenance labor.
- It also means your maintenance team can service an entire cluster in one visit.
The triangle rule for shelf and surface compositions:
- Choose three plants of different heights.
- Arrange them so their tops form a triangle, not a straight line.
- Leave visible space between each pot so leaves don't touch.
Pro Tip: Leave several inches of open air between foliage in any cluster. Crowded leaves restrict airflow and accelerate pest or disease spread across your entire collection.
Anchor ratios to follow:
| Zone Size | Large Anchor | Supporting Plants | Hanging/Shelf Element |
|---|---|---|---|
| — | 1 | 2–3 | Optional |
| 400 sq ft | 2 | 4–6 | 1–2 |
| — | 3+ | 6–8 | 2–3 |
Match Plants to Light, Airflow, and Human Use
Species selection and placement are inseparable. The wrong plant in the right spot still fails.
Assess your microclimates before selecting species:
- Bright windows: Wide-leaf tropical forms, columnar specimens, and most flowering varieties thrive here.
- Low-light interiors: Choose low-light-tolerant columnar or broad-leaf forms. Avoid flowering species.
- Near HVAC vents or drafty zones: Select drought-tolerant, leathery-leaf species that handle temperature swings.
- High-humidity areas (kitchens, near sinks): Humidity-loving trailing species and ferns do well; avoid succulents.
Pro Tip: Prioritize environmental compatibility over visual perfection. A plant that looks slightly less dramatic but thrives in its spot will always outperform a showstopper that slowly declines.
Group by care schedule when finalizing placement clusters. Plants with weekly watering needs go together; drought-tolerant species form their own cluster. Your maintenance team will thank you, and plant health improves measurably when care schedules align with placement.
How Maintenance Needs Should Drive Placement Decisions
Placement that ignores maintenance access creates problems within weeks. We see it constantly: beautiful arrangements that nobody can service without moving furniture or climbing over desks.
Access guidelines:
- Every pot must be reachable without moving furniture or blocking egress.
- Heavy pots on high shelves require a planned service ladder and a written protocol.
- Group clusters near water sources where possible to cut service time.
- Avoid placing plants where they obstruct emergency signage, fire sensors, or HVAC intakes.
Maintenance checklist cadence:
- Weekly: Watering check, leaf wipe for dust accumulation.
- Monthly: Pest inspection, deadheading, pruning for phototropic lean.
- Quarterly: Light-level audit, rotation for even growth, soil amendment check.
- Annually: Full refresh assessment, replacement of any specimens that have declined beyond recovery.
Pro Tip: Denser, high-maintenance groupings increase labor costs proportionally. Match placement density to your maintenance budget, or consider a managed service plan that bundles design, maintenance, and replacement into a single fixed fee.
| Maintenance Task | Frequency | Placement Implication |
|---|---|---|
| Watering | Weekly | Place near water access; avoid isolated corners |
| Pest inspection | Monthly | Leave space between plants for visual checks |
| Pruning/rotation | Monthly | Ensure full access around floor specimens |
| Full refresh | Annually | Plan for temporary removal access |
What Does a Commercial Plant Installation Actually Cost?
Budget clarity is what moves plant projects from "good idea" to approved line item. Costs vary by plant size, number of anchors, green walls, delivery, installation, and whether you include a maintenance plan.
| Project Type | Typical Range | What Drives Cost |
|---|---|---|
| Small pilot (1–2 zones) | — | Plant size, planter selection |
| Standard fit-out (full floor) | — | Anchor count, species variety |
| Full plantscape with green walls | — | Irrigation, electrical, wall structure |
| Monthly managed maintenance varies with zone count and visit frequency |
Timeline from audit to install:
- Site audit and design: 1–2 weeks
- Procurement (standard species): 1–2 weeks
- Large specimen or custom planter lead time: 4–8 weeks
- Installation day: typically 1–2 days for a full floor
- 30–90 day tune-up: adjust placement, replace any non-acclimating specimens
Green walls add electrical and irrigation requirements that extend timelines and require contractor coordination. Factor that into any approval process.
How to Hire a Plant Design Provider: One-Page Spec and Eight Questions
A concise spec protects you in procurement and reveals vendor capability fast.
Your one-page spec should include:
- Total square footage and zone breakdown
- Desired anchor count and approximate heights
- Maintenance frequency preference (weekly, biweekly, monthly)
- Budget band (install and monthly maintenance separately)
- Site constraints: HVAC vent locations, window orientation, lighting levels
- Timeline and approval contacts
Eight questions to ask every vendor:
- Do you guarantee plant health and include replacements at no extra cost?
- What is your standard maintenance cadence, and what does each visit include?
- What is your emergency replacement SLA if a specimen declines suddenly?
- How do you assess microclimates before proposing species?
- Are your technicians trained in Integrated Pest Management?
- Do you carry liability insurance for on-site work?
- Can you provide photos of similar commercial installs and references?
- How are install costs and ongoing maintenance costs broken down in your contract?
Red flags: Any vendor who proposes dense clusters without a maintenance plan, ignores HVAC vent locations during the site visit, or cannot provide references from comparable commercial spaces.
Pro Tip: Ask for a sample look-book or portfolio of past commercial installs before signing anything. Visual evidence of similar-scale projects tells you more than any sales conversation.
Procurement checklist:
- Confirmed site visit before proposal
- Written maintenance SLA with replacement terms
- Sample layout drawings for at least one zone
- Itemized cost breakdown (install vs. ongoing)
Greenspace Plants offers interior plant services that cover design, installation, maintenance, and replacement under a single fixed monthly fee, with no upfront costs or long-term commitments.
How Do You Know If Placement Actually Improved Space Flow?
Install day is not the finish line. The real test happens over the following weeks as plants acclimate and occupants adjust.
Before/after photo prompts:
- Capture primary sight lines from entry points and main seating positions.
- Photograph corner visibility and path clearance at shoulder height.
- Document occupant density zones (where people naturally cluster or avoid).
Measurement checklist:
- Circulation observation: note whether main paths remain clear after 2 weeks of daily use.
- Perceived openness: run a short staff pulse survey (3 questions, 2 minutes) at 30 and 60 days.
- Maintenance log: track pest incidents and replacement rates as a proxy for placement quality.
- Room usage: monitor whether meeting rooms and break areas see changed booking or dwell patterns.
Iteration rules:
- Wait 4–8 weeks after install before making major edits. Plants need time to acclimate, and first impressions of a new arrangement are unreliable.
- Minor adjustments (rotating a pot, shifting a surface plant) are fine monthly during the first quarter.
- If a specimen shows persistent decline after 8 weeks, reassess the microclimate before replacing it with the same species.
Pro Tip: Productivity and wellbeing outcomes from greenery are real, but they take weeks to register. Measure occupant sentiment at 30 and 90 days, not on install day.
Simple success metrics:
- Fewer blocked sight lines confirmed by photo comparison
- Improved perceived openness in staff survey at 60 days
- Reduced plant replacement rate after the first quarter
Key Takeaways
Strategic plant placement shapes how people move through and perceive a commercial office: vertical planes, anchor ratios, and breathing room are the three levers that determine whether greenery opens a space or clutters it.
| Point | Details |
|---|---|
| Three vertical planes | Distribute plants across floor, surface, and hanging levels to create architectural flow. |
| Anchor ratio | Use one large floor specimen per 150–200 square feet to define zones without overcrowding. |
| Breathing room | Reserve 20–30% of every horizontal surface as empty space to keep arrangements intentional. |
| Environmental-first rule | Prioritize light and HVAC conditions over aesthetics; a declining plant undermines the design. |
| Maintenance drives placement | Every pot must be accessible without moving furniture; group by care schedule to cut labor. |
What Most Offices Get Wrong About Plant Placement
The most common mistake we see in commercial spaces is not under-planting. It is over-planting combined with under-maintaining. An office manager approves a beautiful install, the plants look great on day one, and then six months later half the collection is struggling because nobody planned for access or matched species to the actual light levels.
The fix is almost always simpler than people expect. Start with one pilot zone, typically reception or a main break area. Test the anchor placement, confirm the maintenance cadence works with your facilities team, and measure the response before scaling. Professional installers recommend this 30–90 day pilot approach precisely because it surfaces microclimate surprises and access problems before they multiply across a full floor.
The other underestimated factor is the design value of plants as architecture. Most clients think of greenery as decoration added after the real design decisions are made. The offices that feel genuinely different treat plants the way they treat furniture: as load-bearing elements of the spatial experience. A well-placed anchor specimen does more for a reception area than a new paint color.
If your site involves green walls, complex HVAC constraints, or you simply lack the in-house maintenance capacity to keep a plantscape healthy, that is the moment to bring in a managed provider rather than attempt it alone.